Instructions
Measure string height at the nut and for action adjustments
Range of measurement: 0 - 10mm / 0 - 0.4 inch
Accuracy: ±0.05mm / 2 thousandths of an inch
Battery: SR44 / LR44 1.5v button cell
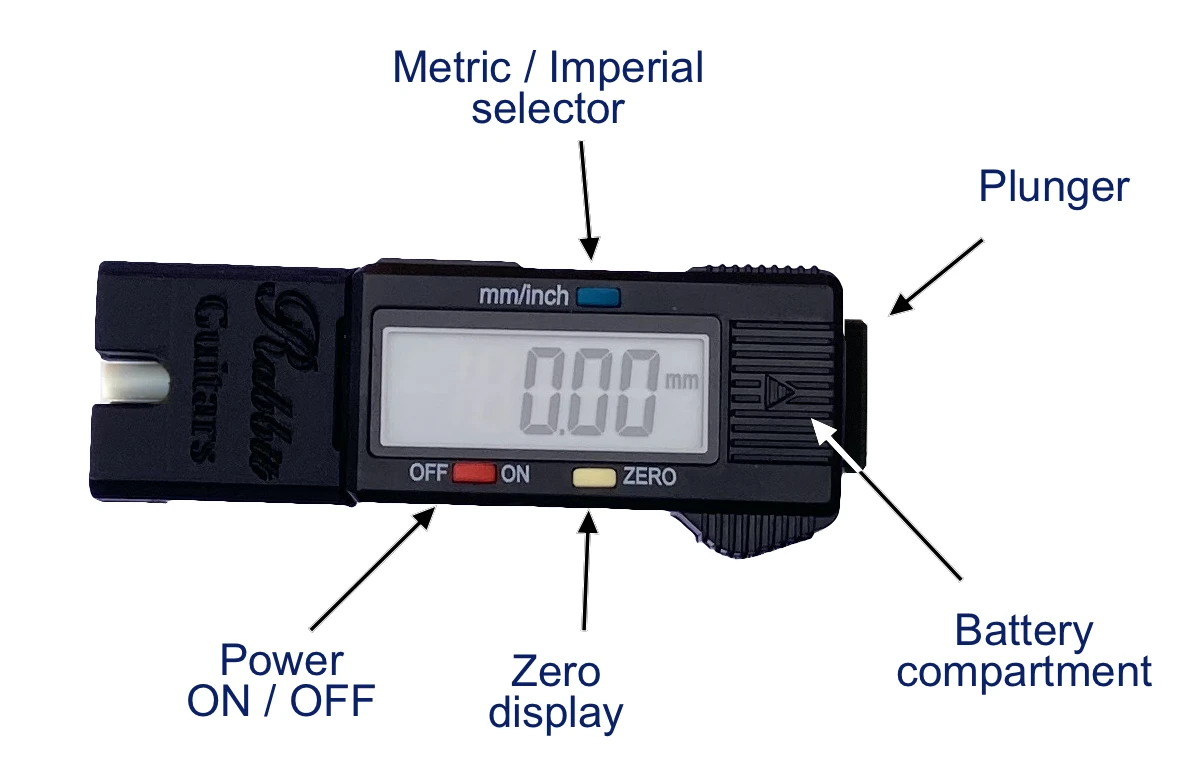
Peel off the screen protector and install the battery (see section below) before use.
How to use
The digital gauge is used to measure the distance between the underside of a string and the top of the fret. You can use this measurement to determine the results when you are:
- Cutting nut slots
- Measure at the first fret on each string as you adjust its nut slot.
- Adjusting the bridge
- Measure the action at the halfway point of the string - the 12th fret - on the top and bottom strings and set the bridge height.
- If your bridge has separate height adjustable saddles, adjust the other strings so that the curvature matches the fretboard radius.
- Adjusting the truss rod
- Put a capo at the first fret and press the string down at the last fret.
- Measure the relief at the mid-point of the truss rod, probably the 8th or 9th fret.
The technique is basically the same for each job:
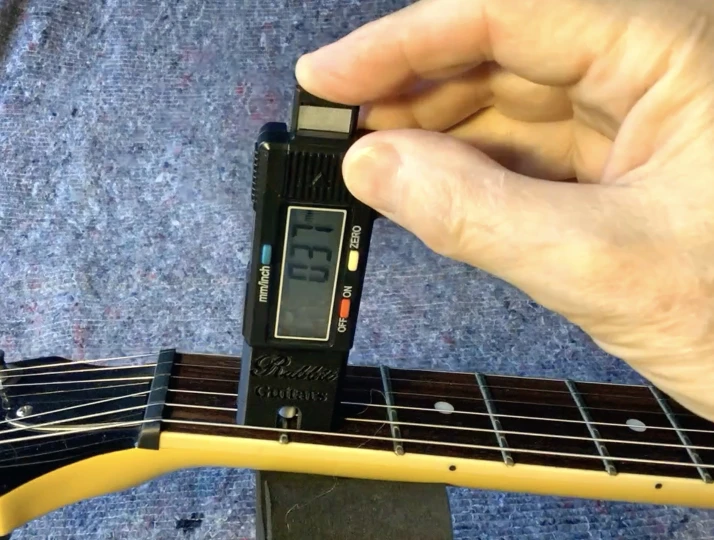
- Turn on the gauge and select millimetres or inches. Set it up on the guitar so that the gauge is facing the edge of the fretboard.
- Hold the gauge firmly so that it doesn’t move around and let the plunger rest on the string. Make sure the string is not touching the sides of the string channel. Zero the gauge.
- Now press the plunger to push the string down to touch the fret and take the reading.
- Make any necessary adjustments and repeat the measurement.
Notes
I developed the gauge originally for my own use as a guitar tech being unwilling to pay what seems to me to be the high price of the Stewmac gauge and unwilling to go for the - still not cheap - Chinese replicas. Having found it effective and useful I thought that maybe others would be interested.
For the most consistent readings, it’s important to hold the gauge still with one hand so that it doesn’t move around or wobble while you press buttons and push down the plunger with the other hand. You’ll get better with practice!
I recommend that the measurements are done with the guitar laid flat on the workbench. Make sure that the guitar is supported evenly so that the string height is not affected by the weight of the guitar or the neck.
It is sometimes argued that with the guitar laid down on its back, the weight of the plunger will press the string down slightly, affecting the zero position. Therefore the readings should be taken with the guitar in the playing position, typically on your lap or on its side on the workbench.
How you use the gauge is up to you; whatever works best and feels most comfortable to you. However, I would make these points:
- Any error is very small, in the order of a few thousandths of an inch or 0.1mm.
- Using the digital gauge is more accurate than other measurements such as feeler gauges or reading from a ruler.
- It’s much quicker and easier to use the gauge with the guitar laid down on a firm surface than in your lap!
So when you are setting up a guitar, using a digital gauge will get you into the ball park quicker and more accurately than the traditional methods. Then make small adjustments to refine the playability to suit the way you play. You should trust your feelings when setting up a guitar instead of aiming for a set of numbers. If it feels right, then it is right.
If you have one guitar already set up the way you like, then the digital gauge will enable you to get a new guitar playing the same way very quickly.
There are many enthusiastic users of digital gauges for measuring action across YouTube: Texas Toast Guitars and Milehouse Studios among them.
Battery installation
The battery is an SR44 or LR44 1.5v button cell supplied. Replacements are available anywhere.
The battery cover just slides off to the right. Insert the battery with the markings face up as shown in the photo.
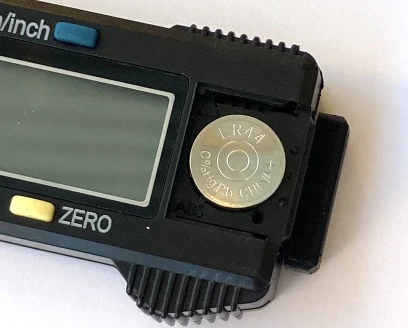
Slide the battery cover back on.
Tips
If the plunger doesn’t move easily then this can be adjusted by loosening the screws on the back of the gauge by a quarter of a turn or less. When the gauge is held vertically, the plunger should drop down under its own weight.
If you are not going to use the digital gauge for a while, the battery will last longer if you take it out. There’s a slot in the case to keep it. Even if the display is turned off, there is still a small amount of battery drain. This is not unusual with these types of digital gauges.
If you have any suggestions for improvements, I’m always interested to hear from you.
Rabbit Guitars UK